Instalación de Zabbix y Nginx en Debian 10
¿Como Instalar y configura el servidor Zabbix para Nginx en Debian 10?
Hola amigos, hoy vamos a ver Instalación de Zabbix y Nginx en Debian 10.
Primero, ¿Que es ZABBIX?.
Zabbix es un Sistema de Monitorización de Redes creado por Alexei Vladishev. Está diseñado para monitorizar y registrar el estado de varios servicios de red, Servidores, y hardware de red. Usa MySQL, PostgreSQL, SQLite, Oracle o IBM DB2 como base de datos. Su backend está escrito en C y el frontend web está escrito en PHP.
Fuente Wikipedia
Antes que nada hay que aclarar que tenemos instala la base de Debian 10, más PHP, NGINX y MARIADB. Si no lo tenéis instalado, lo instalamos ahora mismo.
Para evitar los problemas de «bash» nos logueamos como root usando el comando «su – «.
Instalamos el PHP con:
# apt install php7.3El Nginx con:
# apt install nginxY MariaDB con:
# apt install mariadb-server mariadb-clientTerminada la instalación, se debe ejecutar el comando mysql_secure_installation, que hace una serie de verificaciones e cambios en la configuración para garantizar la seguridad del servidor mysql.
root@server:~# mysql_secure_installation

NOTE: RUNNING ALL PARTS OF THIS SCRIPT IS RECOMMENDED FOR ALL MariaDB
      SERVERS IN PRODUCTION USE!  PLEASE READ EACH STEP CAREFULLY!

In order to log into MariaDB to secure it, we`ll need the current
password for the root user.  If you`ve just installed MariaDB, and
you haven`t set the root password yet, the password will be blank,
so you should just press enter here.

Enter current password for root (enter for none):
OK, successfully used password, moving on...

Setting the root password ensures that nobody can log into the MariaDB
root user without the proper authorisation.

Set root password? [Y/n] n
 ... skipping.

By default, a MariaDB installation has an anonymous user, allowing anyone
to log into MariaDB without having to have a user account created for
them.  This is intended only for testing, and to make the installation
go a bit smoother.  You should remove them before moving into a
production environment.

Remove anonymous users? [Y/n]
 ... Success!

Normally, root should only be allowed to connect from 'localhost'.  This
ensures that someone cannot guess at the root password from the network.

Disallow root login remotely? [Y/n]
 ... Success!

By default, MariaDB comes with a database named 'test' that anyone can
access.  This is also intended only for testing, and should be removed
before moving into a production environment.

Remove test database and access to it? [Y/n]
 - Dropping test database...
 ... Success!
 - Removing privileges on test database...
 ... Success!

Reloading the privilege tables will ensure that all changes made so far
will take effect immediately.

Reload privilege tables now? [Y/n]
 ... Success!

Cleaning up...

All done!  If you`ve completed all of the above steps, your MariaDB
installation should now be secure.

Thanks for using MariaDB!
root@server:~#
Ya estamos listos para instalar y configurar Zabbix
1. Instalar el repositorio de Zabbix
# wget https://repo.zabbix.com/zabbix/5.2/debian/pool/main/z/zabbix-release/zabbix-release_5.2-1+debian10_all.deb
# dpkg -i zabbix-release_5.2-1+debian10_all.deb
# apt update
2. Instala el servidor, la interfaz y el agente de Zabbix
# apt install zabbix-server-mysql zabbix-frontend-php zabbix-nginx-conf zabbix-agent3. Crear base de datos inicial
Ejecuta lo siguiente en el host de base de datos.
# mysql -uroot -p
password
mysql> create database zabbix character set utf8 collate utf8_bin;
mysql> create user zabbix@localhost identified by 'password';
mysql> grant all privileges on zabbix.* to zabbix@localhost;
mysql> quit;
En el servidor Zabbix, importe el esquema y los datos iniciales. Se le pedirá que ingrese la contraseña recién creada.
# zcat /usr/share/doc/zabbix-server-mysql*/create.sql.gz | mysql -uzabbix -p zabbix4. Configurar la base de datos para el servidor Zabbix
Editar archivo /etc/zabbix/zabbix_server.conf
# nano /etc/zabbix/zabbix_server.confbuscamos la linea y editamos con nuestra contraseña.
DBPassword=password5. Configurar PHP para la interfaz de Zabbix
Editar archivo /etc/zabbix/nginx.conf, descomenta y configura las directivas ‘listen’ y ‘server_name’.
# listen 80;
# server_name example.com;
Después tenemos que modificar el puerto de escucha por defecto de nginx en
# nano /etc/nginx/sites-available/default
server {
listen 82 default_server;        ## Cambiar de 80 a 82
listen [::]: 82 default_server;   ## Cambia de 80 a 82 también
Cambiamos los permisos de Zabbix
chmod -R 775 /usr/share/zabbix/systemctl restart nginx5. Inicia los procesos del agente y del servidor Zabbix
Inicia los procesos del agente y del servidor Zabbix y configúralos para que se inicien con el sistema.
# systemctl restart zabbix-server zabbix-agent nginx php7.3-fpm
# systemctl enable zabbix-server zabbix-agent nginx php7.3-fpm
6. Configurar la interfaz de Zabbix
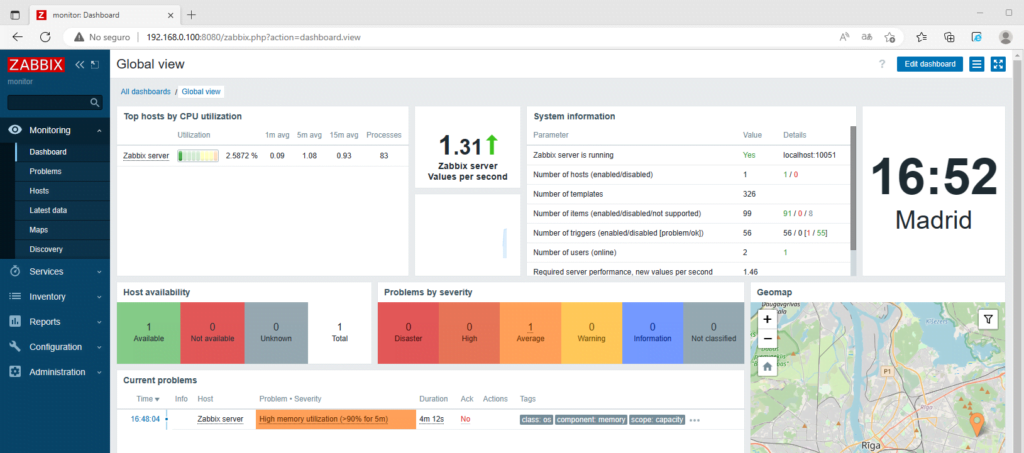
Conéctate a tu interfaz Zabbix recién instalada: http://server_ip_or_name
Sigue los pasos y listo.
Por defecto :
User: Admin
Pass: zabbix
Esto es todo por ahora, no olvideis de comentar.

Fuente: ZABBIX


